|
|
- To add a form for orders, put the cursor
inside the table.
- Click Insert > Form. Submit
and Reset buttons will appear.
- Press Enter several times to make space
for the form.
- Insert text and options for user to
select: (e.g. different sizes, colors,
quantities). Precede the options with one of these choices.
option buttons
check box
drop-down box
-
Right-click
inside each button
and select Form Field Properties. For the drop-down box,
you will see this window. 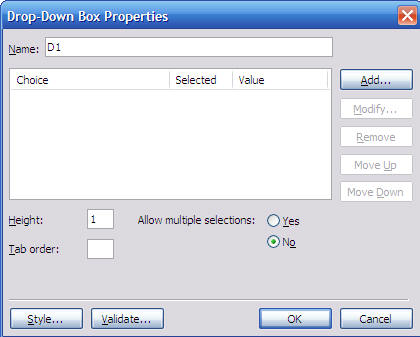
- Type in a Name for the form
field, e.g. Colors.
- Click Add to add choices.

- Repeat this procedure for each form
field (button or text box).
- Lastly, set the form field properties
for sending the information by right-clicking
inside the Submit
button.
- Select Form Properties.
- Type in the email address of the person
who will be receiving customer orders.
- Delete the File name in the box and type
in Orders.
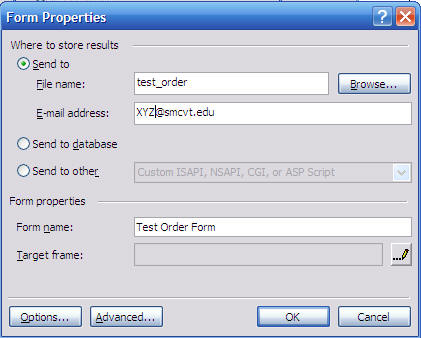
- Type in a name for your form, e.g.
Order Form.
- Click Ok.
- Click on Preview and try out your
order form by sending yourself a test order.
|